Saturday, October 11, 2014

Building an aquaponic raft bed, the finish.

Finally finished up building my aquaponic raft bed, it pretty much started working without a hitch.
Tuning the fill and drain portion was remarkably  smooth and easy, I only had a problem with the swirl filter getting clogged pretty quick.


Installing layer of plastic cover sheeting, I used 2x4s to hold down the insides of the sheets for a tighter fit.

Installed uniseal pipe fittings, these units are pretty awesome and cheap to use.
However in this case, it was a little difficult. I drilled the recommended size hole for a 1 inch uniseal, unfortunately being that wood is not at all flexible,  the intended one inch pipe could not be inserted  as the seal could not expand to let the pipe through. I ended up inserting a 3/4 pipe which worked just fine.

Added water checked for leaks. None!.


Added the rafts and planted some plugs with seeds. Can't wait to see them growing.


Saturday, September 27, 2014

Building a Diy Aquaponic Raft tank System with Reclaimed Materials

Well it has been a while since my last post. In the time since I last posted the raft bed we had installed  went down hill, the crayfish in the tank died and the plants started going bad regardless of any effort to turn them around, on top of that the tank itself began to leak in various places.  Granted the system was not exactly perfect, but it did the job for a while.
First raft tanks and plants.

Anyhow, I decided to rip the bed apart and build a new tank that would hold at least three 2'X4' rafts.
I priced the material at home depot and came up with a $180 cost estimate. I just don't have that kind of money to spare so I started looking for materials I could reclaim which was surprisingly easy. Within a month I had everything I figured I would need.  Of my own money I've so far spent only $13.00 for some project board, Uniseals, and black plastic sheeting.

I'm half way done as of today and to have it working by this tuesday. Anyhow here's how it's going so  
far.

Step one:


I should first note that this is most likely not the best way to build a raft tank, but as we just might have to move in the next few months I wanted to build something that could be easily taken apart and reassembled somewhere else without to much effort. This is what I came up with.

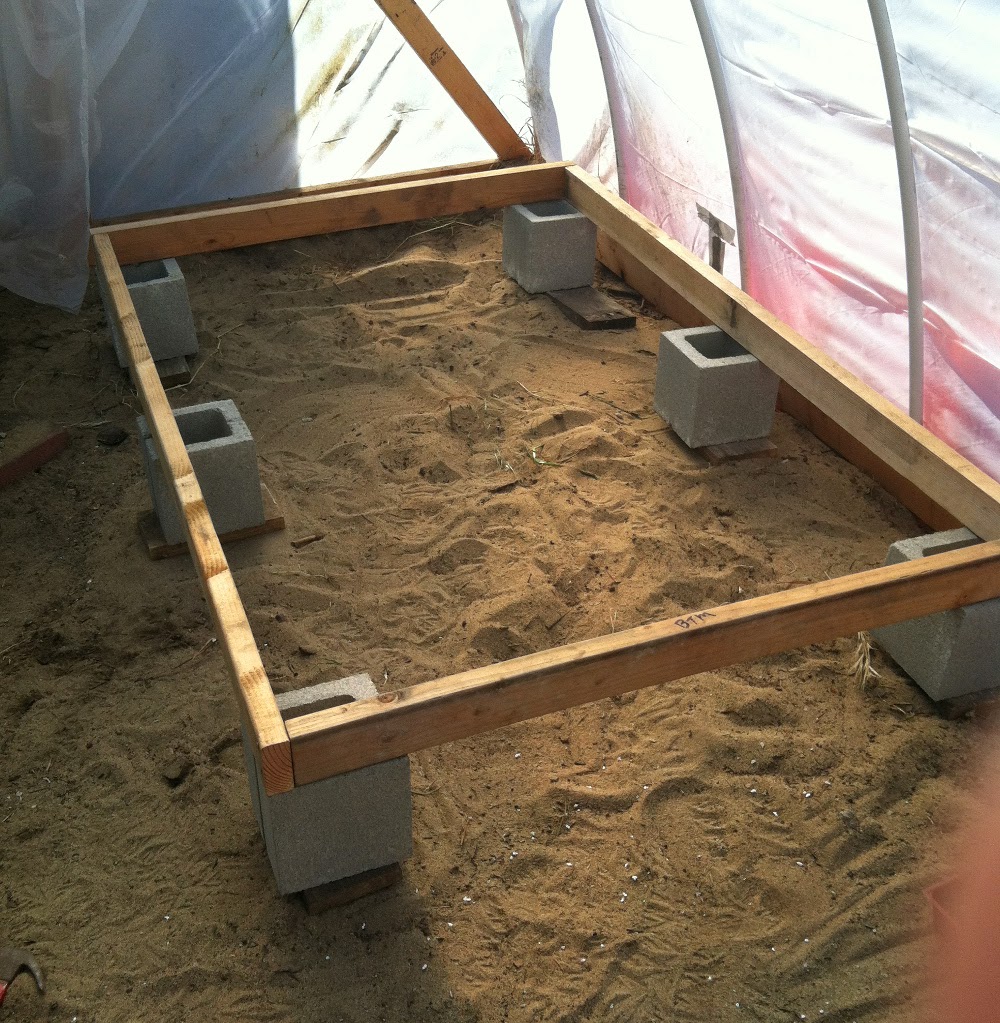
I first cleared out a place, leveled the ground and built a base frame on some cinder blocks 51 7/8" wide by 75 7/8 long. (I got most the boards for this on freecycle.org try it, it's awesome!)

Step: Two


Added some beams 


Added a 4'x4' and 2'x4' project board for the floor of the tank. As you can see the board are on the inside of the frame. The tank  frame itself will over lap the project board, and site directly on to the bottom frame.

Step Three:


I next covered the project with a thick rubber sheet that was laying around, I had just enough to cover the project boards and frame. If I had  twice more of this material I would have gone another route entirely.

Step Seven:


Next I built the tank frame itself,  the inside dimensions are 6 1/6" X 72 1/4" allowing inside space some the plastic lining and rafts to move around easily.
This whole thing come apart in 4 pieces for easy transport.


Well that's todays work, I'll post the final finished job asap.


Monday, April 28, 2014

When it goes south.

Since my last post a few things have gone wrong. First we lost a lot fish do to ich disease , and unfortunately we didn't act quick enough to treat the fish properly and save them. As result, we lost 22 of 26 tilapia. The following week 19 of 20 small koi also kicked the bucket. We were then promised 40 new koi from local koi pond owner whom suddenly found herself with hundreds of newly born koi. After two months of waiting she finally decided she didn't want to give them up. In the mean time we added 40 goldfish to the sump tank and  main tank with the remaining four tilapia.
The result of all this was still not enough fish to produce adequate fertilizer for the plants which very quickly went from beautiful vibrant healthy looking plants to sad unhealthy plants, with that came a massive infestation of Black aphids and thrips. So I decided to rip everything out, fix all the initial construction and pluming errors, and also tear down the DWC tough and replace it with a more efficient design.


Saturday, March 1, 2014

Month 4 progress photos

We are now entering our forth month in our aquaponics experiment, and wanted to share some progress photos. We've learned a lot but still have much to learn. At this time we're looking at constructing a much larger semi-commercial greenhouse that would produce enough to feed ourselves and enough to sell at local farmers and flea markets.
More on that later. 


Beans plants just 2 weeks ago, wow!


Monday, February 24, 2014

Wwoofing at Viridis Aquaponic Growers

Two weeks ago I begun to volunteer as a WWOOFER(Willing Worker on Organic Farms) at  Viridis Aquaponic Growers  In Watsonville. Viridis offered a volunteer labor program with an aquaponics class and Q & A session at the end of the work day, awesome!, the best place to learn is working hands on at real commercial aquaponics facility.
Viridis Aquaponic Growers began operating in Watsonville Ca, in August of 2013 and at 8 acres is now the largest commercial aquaponics farm in the world.

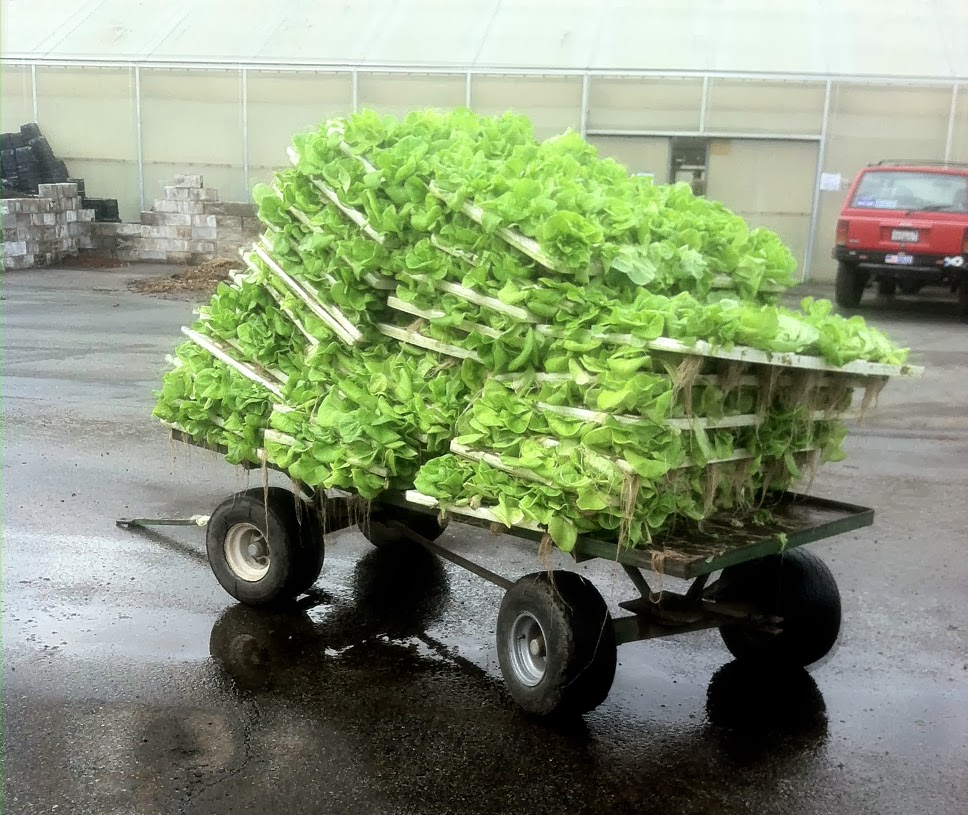
The first day was real learning experience as I was put right to work destroying lettuce that acquired a mildew due to over heating in the greenhouse over the previous weekend. This of course made me extra conscious of temperature and humidity in our greenhouse.

Cart full of unusable lettuce.


Empty raft units after mildewed lettuce was pulled.

Replanting: This process is very quick, inserting seedling
plugs into the rafts then setting them afloat in the raft tank.


Catching loose fish in the raft tank.
Aside from removing and destroying lettuce all day it was great to be able to see how how a commercial aquaponics greenhouse works and what systems they use.
Aquaponics fish tank and filter system


100ft long aquaponic raft system.
Yup , pretty amazing. 


Monday, February 10, 2014

Grow Bed Zones

Well we're two months into our aquaponics experiement. We've learned a number of things though trail and error, I am sure there is still a great deal to learn. One of the most important things we've learned is aboue grow bed zones, also keeping the water level at least 2inched below the surface of the grow bed to prevent algae growth on the surface of the grow beds.

Zone one
Also called the dry zone. Is the about 2 inches in depth, this area should be keep dry, your  bell siphon should begin siphon at least 1-2inches from the surface. Doing this will prevent algae from occurring on the surfuce, protects against collar rot, along with mildew.

Zone Two
This zone is between 6 and 8 inches. This area allows for the delievery of oxygen during the drain part of the flood and drain cycle. This is where nitrification occurs creating and releasing the nutrients and minerals into the system.

Zone Three
This is the remaining space below zone two about 2inches where solids, such as, fish waste and worm castings.

We learned these lessons a bit late as we have some algae growing in sump tank and small areas of our grow beds, at this time is seems to be under control. We were going to use humic acid to darken the water but at this point simply just covering the sump tank preventing sun light from hitting is working just fine.

Wednesday, January 29, 2014

Algae Growth and Plants Yellowing

Over a week we started having problems with algae which continue to grow despite steps eliminate the problem. We've created shading, and reduce the water level in our grow beds, its slowed the spread but still has not disappeared. At this point I'm looking into adding some Humic acid to sump tanks in order to darken the water up so that the algae will die off.

Here's good video regarding algae and humic acid.

Hoping this will do the trick as some new algae has appeared in the new grow beds at are currently cycling.


Algae in the sump tank.

Another problem we're having is nutrient deficiency, mainly iron. I believe this due to us jumping the gun planting  before completely cycling the grow beds.


The yellowing indicates a lack of iron and other nutrients. To fix this we are adding 
Chelated powdered iron Fe-DTPA and Seaweed extract called Maxicrop which contains nitrogen potassium, phosphorus, sulphur, iron, copper, zinc, zinc, manganese, etc.
Here's a link to some good information about the best choice for Chelated Iron.